Sunday 31 January 2010

Lenses

The past couple of days I have been playing with different types of lenses. I'm not sure if I will need any of them or if they were used but I felt it was neccessary to test these incase I do decide to use a special lens for my camera.

The best one that I might possibly use is the fish eye lens. I used the following instructable video to make my own: http://tinyurl.com/ygwx3o5. I really like the idea of using this on my camera but I need to test it out to see what sort of images it can take at the various heights it would be used at.
I also took the viewing lens from a disposable camera and attached this to my camera. This clears the image up a little more and brings the subject closer. I'm not sure if this is the right road to go down because the images should be reflecting the distance that the camera travels. If I was to use this lens then it would make things closer than they actually are.


Other types of lenses that I tried out are coloured ones. I done this using the cellaphane sweet wrappers and played around with these to see what sort of effects could be achieved. None of them were standing out to me and I would say they're not appropriate for this type of product. What I would like the images to have is a vintage photo effect to reflect the retro modern styling of the camera. I've yet to come across anything that can indicate how to do this but I've not given up yet.

Lasercut Reel Ideas

I also took some time to think about the style and pattern on the reel. Also wanting to keep this simple I haven't overly complicated it. My favourite is this one. I have referenced it back to the viewmaster again, this time to the photo cards which it used. I liked how the squares aren't completely angular which helps it to fit onto the reel easily.

The only issue that I have come across with this is the structure. Because the holes were cut so close together and cut all the way through the durability of the reel is lowered. I'm thinking maybe just engraving the squares to create more of a decoration to the reel.

For the handle I have taken inspiration from my mood board of cameras and the idea of using a continuous piece of metal for the handle. Again, I want this to continue the simplicity of the overall product, and kept the rounded curves from the viewmaster styled reel.

Saturday 30 January 2010

Form: Reel/Remote


I have also been working on the form of the reel for the camera. This has been a bit tricky because it has to contain the electronics for the remote. If it didn't require these then it would simply be styling a kite reel to suit the camera but it is a little more complicated.

I need to incorporate a mechanical switch which will trigger the button setting off the camera. The mechanical switch is a user feedback device which will let them know that the camera is working and doing something.

Since the styling and design of the camera is based on being retro but with a modern look, I have looked at using the interaction from the viewmaster. The simple click used in this camera was easy to use and made a nice click noise. I want to recreate this type of interaction with the remote.

The general form of the reel is based on the idea of using one piece of material, ideally metal, so that it is just bent in the right places. This would make one continuous shape and keep the form generally simple and have an easy to use button. Simplicity in this product is something that I am steering towards. I don't want an overly complicated device that looks difficult to use with so many buttons. Cameras today have so many functions and the majority of society don't even know what they are for.

I took small steps to get the reel form right so it started off very angular and eventually became curved, so that it's comfortable to hold.

Form: Development 1

The past week I have been continuing to develop the form of the camera. I'm still finding it a bit tricky to establish what it should look like but just continue to prototype what my mind is thinking.

Of the many prototypes I've been making this one is getting quite close to what I imagine the camera to look like. It's retro, it's small, it's boxy and most of all it resembles a camera.

Here is how I came to something that I am happy with.

I decided to scale the product down a lot compared to my other prototypes I've been making. I thought this would be important because the bigger it is, the more material required to make it and hence the heavier it will be.
With this first one I was trying to create a more produding feature to seperate the lens from the camera. It was also situated slightly more to the left as a hook is required in the centre. This is to hook the reel onto the camera, and due to the aerodynamics this will need to be central.
There wasn't much symmetry with this form and it wasn't working for the project. Therefore I decided to take the protruding curve right across the top of the shape and left the front flatter to enable a more sturdier platform to attach the camera lens. I added two protruding lines on either side to give the camera orientation. This would help the camera look right when it's attached to the balloon. The flat front edge wasn't working for me and with the camera lens still situated at one edge, it still took the symmetry away from the product.
A big part of the styling of this camera is symmetry. Due to the aerodynamics of the camera when it's in the air, it needs to be as stable as possible. Symmetry helps with this. Also, looking at vintage and retro cameras you can see that the focus point of the camera is directly in the middle, where the lens is situated.
So on my next model I took a curve across the top and bottom of the camera, left the lines of orientation, took away all straight angular edges and put in more finer details. This is the one I am happy with and am going to continue developing.

Tuesday 26 January 2010

What is a Retro Product?

Found this definition of what 'retro' is. Thought it was quite a good explanation because it takes into consideration of how it becomes modern and that our mixed up world find old fashioned things fashionable.

"A retro product is a modern product that draws on the past for inspiration. Some retro products are replicas or re-issues of old favourites; others are new designs, but with style or detail touches that suggest an earlier period. Most perform in exactly the same way as their modern looking equivalents, but look old fashioned, and in our mixed up view of the world are more fashionable."

What makes a great retro product?

"A retro product needs to capture enough of the essence of the original form to inspire feelings of nostalgia for the original. It can be a copy of the original, very close to the original design, or retro products can capture the essence of the original, but offer something new."

www.retrowow.co.uk/

Remote Models

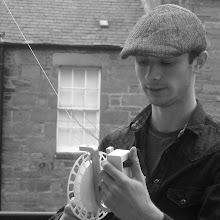
This is the first idea that I tried out for the form of the remote. The remote is an important part of my product. It will contain the button which will trigger the camera to take a photo and will be built into the reel which controls the rope. The two interactions will be built into one component.

The form was just a starting point of working out how a remote would look. I envisioned the camera trigger to be a big red button. I also needed to add grip onto the remote so I moulded some finger placements into the shape. Although this was a starting point, it wasn't aesthetically pleasing and didn't fit with the project.

Leading on from this I tried a more angular approach but kept the idea of a big red button on the front. Also keeping the grip mouldings, I thought it might be a better idea for these to be on each side of the control. This would be useful for both right and left handed users.

My next thought was to take a more modern approach to this and I took inspiration from the new iPod nano shape. I liked how the shape was slim and tried to mimic this when I was thinking about the form. The made a curve on the front and the back to give it several lines of symmetry and this also made it comfortable to hold and interact with. Taking the wheel interaction from the iPod, this was just left as a simple push button but was still made to look like the iPod wheel. I really like the styling of this remote but it still needed to be incorporated with the kite reel.

In my next from attempt I made a copy of the handle from the kite reel so that I could place things against it and see how things looked.
This idea was focused on looking at how the reel was held and what interaction was left for the user. When holding the kite reel it uses both hands, one to hold it and the other to wind it. The only part of the hand that the user would have free is their thumb. This left me thinking that this is where the button can be pressed to trigger the camera. Taking this into account, the handle was made uniform to create the compartment that the remote would be cased in. The button was strategically placed so that the thumb could reach it without any strain.
This is my favourite form for the remote so far but it's too small to fit all the components for the remote. Also, reflecting on this, there is a larger area as to where the thumb can stretch to so in my next form models I will focus on the user interaction with the button.

Monday 25 January 2010

How Is Retro Modern Described??

Today I have discovered that the styling of my camera is beginning to fall between being retro and modern. But what is the definition for retro modern?? I had a brief look today and couldn't find any definition for it. Maybe there's not one!! But I will make a mood board of current retro modern styled products already on the market and hopefully I can derive my own definition from this.

Prototypes

Form 4

Another quick prototype that I have done is a polaroid shape camera. The two slots on either side is to allow the rope to sit in and be held in place. The two holes on the top would be where carabina clips would be attached. These would be pre tied with the rope and can just be clipped into the holes.


Form 3

My third foam model was inspired by this camera that I came across. I really liked the curvature on the front but decided to keep this more angular on my model. The long lens also helps to give the camera orientation. Although this is not reflected in my model I aim to try and play around with this in my next models I will be making in the next week.

Another reason that I felt it was an appropriate shape for my product is because it gives the orientation of the camera pointing downwards. A big issue I am having with the form is the orientation. I'm so used to the way cameras are currently made, used and stand that I feel my models look incorrect odd. It's difficult to image how a camera show look like in the sky.

The handles on either side of the camera are stabalisers for the rope to be tied onto. After looking back on the idea of using rope to hold the balloon, this may not be the best idea. It makes it look untidy and amateur. I will be rethinking this is my next couple of models I will be making to resolve this issue.


Here's how it would look in proportion to the 3ft balloon


Form 2

The second form idea that I tried was based around using four pieces of rope to stabalise the camera. I made a general camera shape, since this idea was based more on the stabalising method. Four rods, of equal length, were placed on the top of the camera with the lens pointing down. The rope all converged to one point where this was then attached to the balloon. Due to the way I tied the rope, the spinning of the camera was kept to a minimum. But in windy weather conditions this can't be helped if spinning occurs. Aesthetically speaking, this is my least favourite styled camera.


Form 1

This is the first model I made from blue foam to start developing the form of my camera. Because I am targeting photography movement groups, such as lomography, I am taking inspiration from lomo cameras and products. This first model reflects this and also the size of this model, and others are based around the scale of lomo cameras.

The main body shape is styled around the Diana camera which has angular edges and geometric style, I thought this was a good starting point.

I made a slot on either side which was to hold the rope in place for attaching it to the balloon. The stabalising of this wasn't very good and the camera continuously spinned round which would produce a blurred image.

So I was thinking that it could be resolved with the way the knots were tied and the placement of the rope. I found a website called http://www.animatedknots.com/ which had a large directory of knot tying methods and animations to go with these. I used the method of how to tie a swing which used the bowline knot. This firmly attached the camera to a rod which would be attached to the balloon.
Because of this I had to make 8 slots on the edges of the camera to hold the rope in place. In reality these slots would be built into the camera body.


Sunday 24 January 2010

Rationale

The Project
My project started out by looking into domestic photography and how our everyday culture allows us to take photos whenever and wherever. This involved looking at how families store and take photos and the environment that these were viewed in. I looked at ways to alter, enhance or create a new way of doing this. My idea that I have taken forward still fits with this direction and is a new way to take photos. It explores perspectives of taking photos and the play of light on the digital sensor. This can be classed as extreme or aerial photography.


What is it?
A device capable of taking photos and videos for aerial photography snapshots. This is specifically designed for the attachment to a 3ft balloon giving the device enough lift allowing the view from above to be captured.

But why balloons?? Unlike a kite, they don't require wind conditions to provide the lift. Unlike an RC helicopter it doesn't require propellers or power to lift it. Helium balloons are widely available and can be used almost everywhere.

"Of course, the best thing of all is that any passerby who looks up at the moment your camera takes a picture is sure to be smiling at all those balloons." (photojojo)


Who is it for?
Because I want to create a new photography movement and artistic style of experimental photography, the people that are best associated with this is the lomography community. This group are open to experimenting with photography and are very creative when it comes to taking that unique photo. Because of this my form and styling of my product will be inspired by lomo cameras and the people that use them.


Why am I doing it?
Digital cameras are making photography 'cold,sterile and just not interesting' which is taking away the magic and fun that taking photos had, especially with the polaroid. There was an element of surprise but also disappointment at times by not knowing what the outcome would be. This has now been changed due to the technological advances in photography. This aerial photography device will create a new style of artistic and experimental photography.


How does it work?
-A 3(possibly 5) foot balloon is filled with helium
-Balloon is attached to a camera device
-Camera device is attached to a reel
-Balloon is sent into the air
-Photos/videos are taken via a remote which is built into the reel
-Data is stored on the camera
-Camera is controlled via the reel
-Reeled in to retrieve camera
-Plug into laptop to retrieve photos

Additional Info:
Videos are 30 frames per second and a resolution of 720x480. Photo quality is 1600*1200 pixels. Memory will be classed as internal as an SD card will be inside to store the data but cannot be removed by the user. Data is retrieved through connecting it via usb to a computer/laptop. Videos will be in AVI format while photos will be JPEG.

Thursday 21 January 2010

570 Megapixel Digital Camera

"Fermilab are building a massive 750 megapixel camera, which features a total of 74CCD sensors, and it is being built by a team of astronomers and particles physicists.

The camera is being built to take photos of the universe and to see whether dark energy exists and exactly what it is.

The 570 megapixel is costing a massive $35 million, and when it is completed it will be mounted to a telescope in Chile, and it will be used over a five year period to map more than 300 million galaxies."


Via: geeky-gadgets.com

Tuesday 19 January 2010

Disney Pixar's UP

Last week I watched UP, classing it as essential research for my project, thinking that it would give me some inspiration for my project. But, as much as I liked it as a movie, I love the book even more. Last week, in Waterstones, I came across a book called 'The Art Of UP' by Tim Hauser (Author) and Pete Docter (Foreword). The illustrations and drawing style behind the movie was more inspirational to me than the movie itself. Here's a couple of images from the book, which I hope to buy soon.


Here's some work on the development and production of the movie by Lou Ramano: http://louromano.blogspot.com/2009/05/art-of-up_3697.html